Accettare Monero
Index
Istruzioni per la GUI
Accettare un pagamento con la GUI è molto semplice. Non importa se sei un commerciante o un utente, avrai due pagine disponibili: Ricevi e Commercianti.
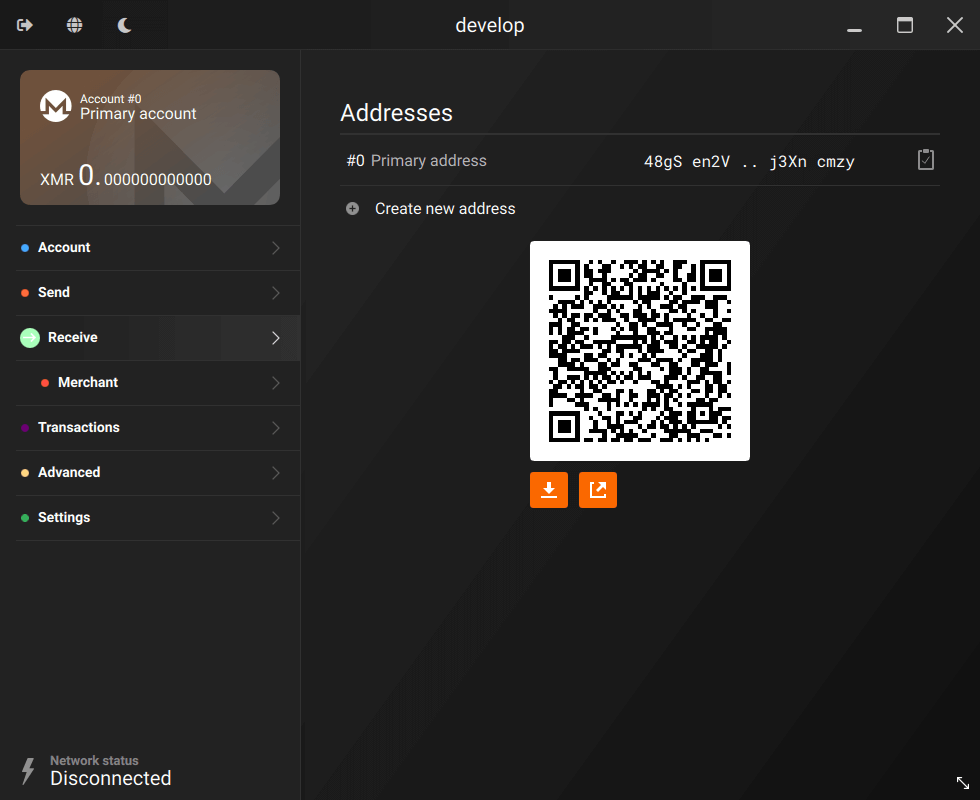
La pagina di ricezione (mostrata sotto) è spiegata in ogni dettaglio nella guida della GUI.

Per ricevere XMR devi solo fornire a chi deve pagare un @indirizzo al quale possono inviare fondi. Il più delle volte è più semplice condividere un codice QR e consentire a chi deve pagare di scansionarlo, invece di incollare la stringa alfanumerica. Con la GUI ogni indirizzo generato viene fornito con il suo codice QR. Fai scansionare il codice QR con Monero wallet sul telefono e ricevi i tuoi XMR in pochi minuti. Ricorda che puoi generare tutti gli indirizzi (indirizzi secondari) che desideri. Ciò è utile se si desidera mantenere separati i fondi per qualsiasi motivo.
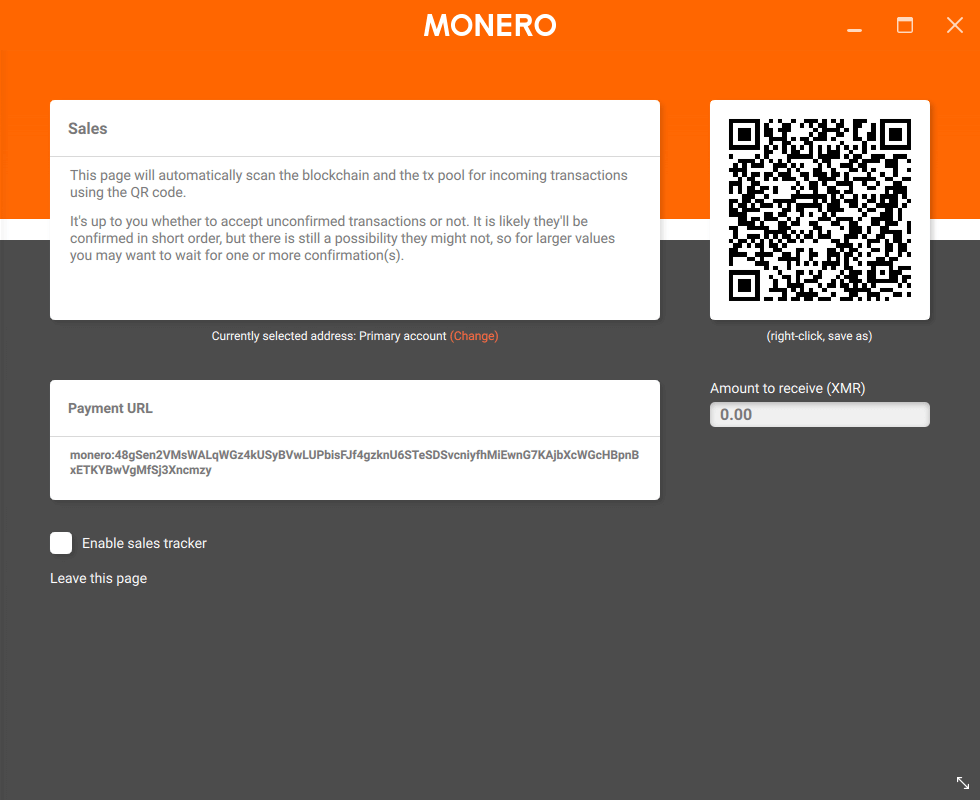
I commercianti troveranno probabilmente più conveniente utilizzare la pagina "Commerciante" (schermata seguente), che è spiegata in dettaglio nella sezione "Visualizzazione commerciante" di la guida linkata sopra.

This is a POS-like page that merchant can easily use to set the amount of XMR to receive. If the 'Sale tracker' option is enabled, you will see the payments while they arrive in real time in your wallet, along with the number of confirmations.
Queste due pagine offrono a tutti la possibilità di ricevere facilmente XMR seguendo questi passaggi:
- Vai alla pagina 'Ricevi' e crea/seleziona l'indirizzo dove desideri ricevere le tue monete.
- Condividi l'indirizzo composto da lettere e numeri con la persona da cui desideri ricevere monete. Probabilmente potresti preferire l'utilizzo del più intuitivo codice QR.
- Se desideri specificare l'importo da ricevere, accedi alla pagina "Commerciante" (dopo aver selezionato nella pagina "Ricevi" l'account che verrà utilizzato per ricevere XMR).
- Inserisci l'importo da ricevere, quindi condividi con il pagante l'URL di pagamento o il codice QR. Se desideri monitorare il pagamento in tempo reale, seleziona l'opzione "abilita tracker vendite".
- Attendi l'arrivo del pagamento e delle conferme necessarie (Maggiori sono le conferme, più sicura sarà la transazione. Hai bisogno di almeno 10 conferme prima di poter spendere i fondi.).
Istruzioni per la versione CLI
When you create your wallet for the first time, an address will be automatically shown to you. That's your primary address. If you want, you can simply use that address to receive payments. You should be concerned about who knows about this address (since one address in different locations can be associated), but you do not need to worry about blockchain observers watching transactions to this address like with Bitcoin. A friend can send transactions to the same address without reduced privacy.
You can have much more control if you want to. Monero gives the possibility to create multiple accounts, each containing multiple subaddresses, useful if you want to control multiple accounts. For example, you may want to have an account for receiving donations and another one for your daily use. That will allow you to easily monitor incoming funds to your 'donations' account, without mixing it with your primary account.
Per creare un account, esegui semplicemente questo comando:
account new [label text with white spaces allowed]
Ora possiedi un altro account separato da quello principale. Puoi passare da un account all'altro in qualsiasi momento.

As you can see from the picture above, every account has an index number that you can use to switch from one account to the other using the command `account switch [index]`. For example, using the picture above as reference, if you would like to switch to the 'Donations' account to monitor it, you can do so by giving your CLI this command `account switch 1`. Now you are sitting on your 'Donations' account and you can start using it right away.

Every account can host a virtually infinite amount of subaddresses. These work exactly like a normal address and you can create as many as you want and use them to receive XMR to the account they are linked to. To create a new subaddress for an account, use the command:
address new [label text with white spaces allowed]
Note that the instructions below are just the minimal necessary to create and use accounts/subaddresses. The CLI offer more capillary ways to handle accounts and the wallet in general. Use the command 'help' to list all the available options.
Istruzioni per i commercianti
If you are a business and you wish to programmatically receive transactions or use advanced features like multisignature, it's suggested to consult the guide per sviluppatori. If you need support, the community will always be happy to help. Come chat on #monero, the chatroom is on Freenode, but also relayed on MatterMost and Matrix.
Se preferisci non gestire direttamente i portafogli, puoi utilizzare un sistema di pagamento di terze parti. I membri della comunità monero hanno creato una serie di integrazioni per varie piattaforme e lingue. Puoi trovare maggiori informazioni su l'organizzazione GitHub.
Se stai cercando un altro sistema di integrazione da terze parti, puoi trovare un elenco di gateway di pagamento attivi the merchant page. Some of those offer nice features like the possibility to automatically convert part of your income in fiat money or to accept other cryptocurrencies along with Monero.
